Touchscreen calibration raspberry pi

20 Jun 2016

Share to:

วิธี calibration จอ touchscreen raspberry pi

ในบทความนี้ จะอธิบายเกี่ยวกับการ calibration จอ touchscreen ของ raspberry pi โดยจอ touchscreen ที่ใช้คือ Raspberry Pi 7” Touchscreen Display มาเริ่มกันเลยครับ

1.Install xinput calibrator

ติดตั้ง xinput calibrator ด้วยคําสั่ง

sudo apt-get install xinput-calibrator

2.run xinput calibrator

run xinput calibrator โดยใช้คําสั่ง

xinput_calibrator

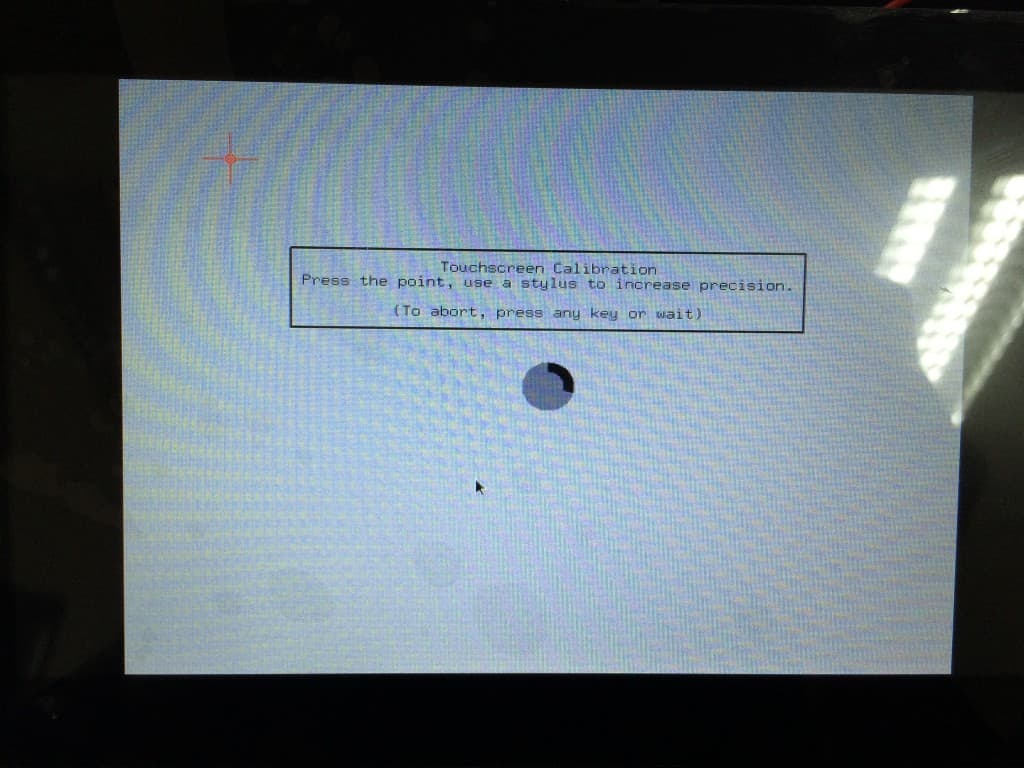
จะมีหน้าจอสําหรับ calibrate ขึ้นมา ให้กดตามจุดในโปรแกรม

Image

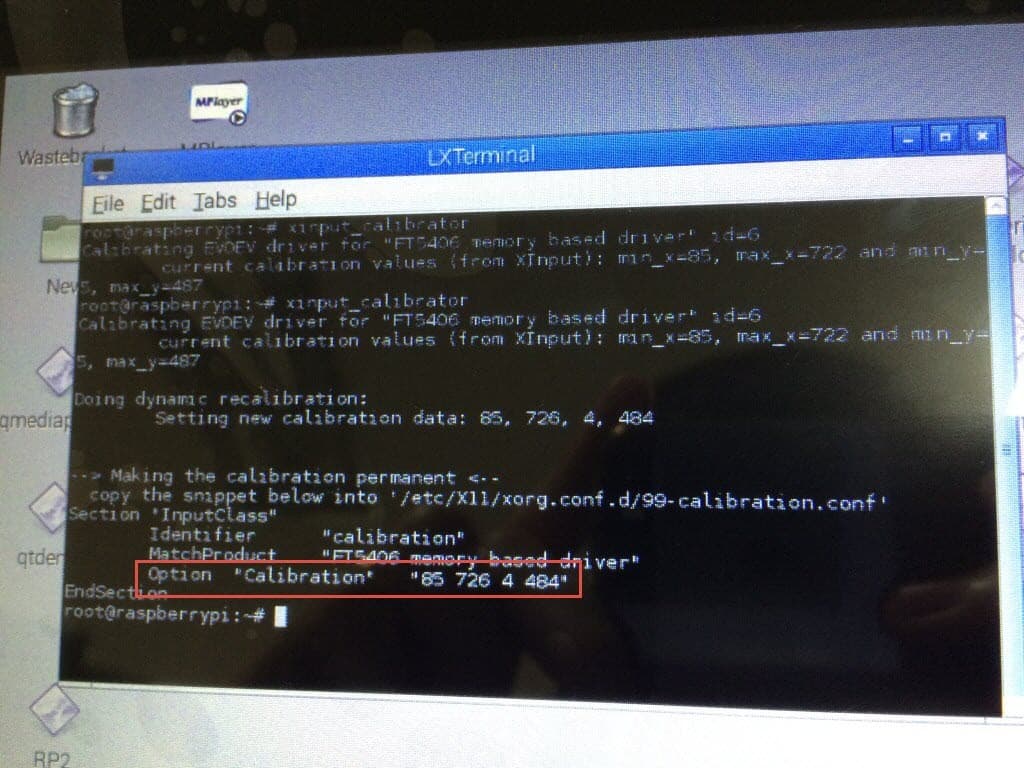
เมื่อกดครบแล้วจะแสดงรายละเอียดของค่า config ให้ copy ไว้(กรอบสีแดง)

Image

3.Update X11 evdev configuration

Update X11 evdev configuration โดยใช้คําสั่งนี้

sudo nano /usr/share/X11/xorg.conf.d/10-evdev.conf

นําค่า config ที่ได้จาก ขั้นตอนที่ 2 เพิ่มเข้าไปตรง touchscreen InputClass

Option "Calibration" "85 726 4 484"

Image

save โดยกด Ctrl+x แล้วตามด้วย y แล้ว enter reboot raspberry pi เสร็จ…

ที่มาของรูปภาพ และข้อมูล swag.raspberrypi.org www.thefanclub.co.za

Suggestion blogs

คํานวณความต้านทาน วงจรอนุกรม

การคํานวณค่าความต้านทานรวมเมื่อนํา R(ตัวต้านทาน) มาต่อกันแบบ อนุกรม ดังรูป

messenger บนเว็บ เปิดให้ใช้แล้ว!!!

messenger ของ facebook เปิดให้ใช้บนเว็บแล้ว messenger.com เมื่อเข้ามาหน้าแรกจะให้เรา login ด้วย account facebook ถ้าเรา login กับเว็บ facebook แล้วสามารถ กดปุ่ม Continue as ... ได้เลย

ติดตั้ง Nginx เพื่อใช้งานร่วมกับ Apache2

ในปัจจุบันมี web server อยู่สองเจ้าที่ได้รับความนิยมคือ apache2 และ nginx สองเจ้านี้จะมีขอดีข้อเสียงต่างกัน nginx จะมีข้อดีคือ สามารถรองรับ user concurrent และ request static file ได้ดีกว่า apache2 ส่วน apache2 มีข้อดีคือ PHP ซึ่ง PHP ของ nginx นั้น จะทำงานผ่านโมดูล FastCGI อีกทีหนึ่ง  ซึ่งจะได้ Performance ที่ช้ากว่า mod_php ของ apache2 ที่ทำงานแบบ


Copyright © 2019 - 2024 thiti.dev |  v1.39.0 |  Privacy policy | 

Build with ❤️ and Astro.

Github profile   Linkedin profile   Instagram   X profile   Youtube channel   Telegram   Email contact   วงแหวนเว็บ